
Connect FlawPilot to ChatGPT
This guide walks you through connecting FlawPilot to ChatGPT in seven steps, each with a screenshot - from installing the plugin to reading your first scan in the chat. It takes about two minutes, and needs no endpoint to paste and no API key.
Installing a plugin needs a ChatGPT account with plugin access.
Open the MCP overviewBefore you start
- A FlawPilot account - you approve the connection with it during install.
- A ChatGPT account with access to Plugins in the sidebar.
- Nothing else. Installing from the directory needs no API key and no config file.
If Plugins is not in your sidebar
Plugin availability depends on your ChatGPT plan, and on Business or Enterprise workspaces an admin may need to allow plugins before they appear. If you cannot see Plugins at all, that is the reason - the FlawPilot endpoint itself is unchanged, and any other MCP client will still connect.
Steps to connect
Open Plugins
Choose Plugins in the ChatGPT sidebar. This is the directory of everything you can connect ChatGPT to, with anything you have already installed listed at the top.
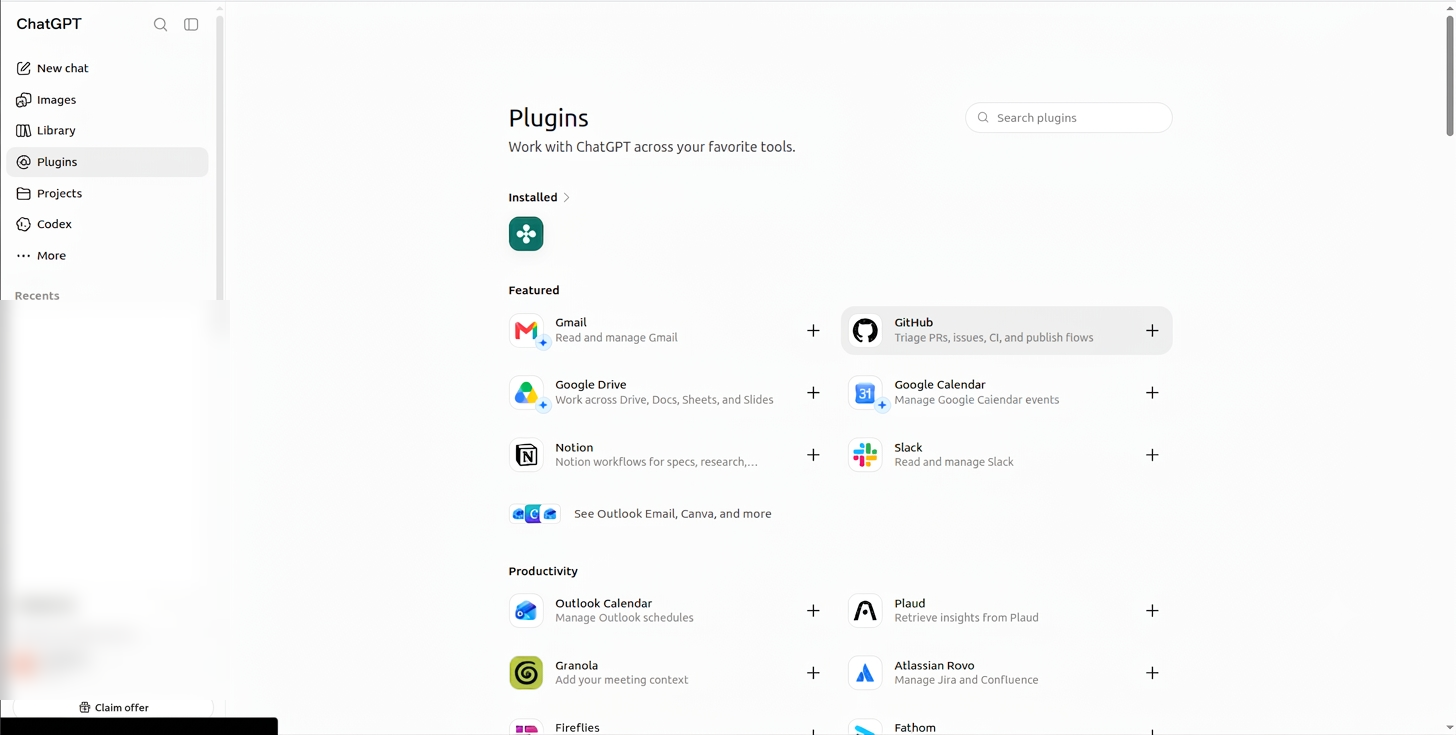
Plugins in the sidebar opens the directory. Search for FlawPilot
Type "flaw" into the plugin search. FlawPilot appears under Public - it is published, so there is no URL to enter.
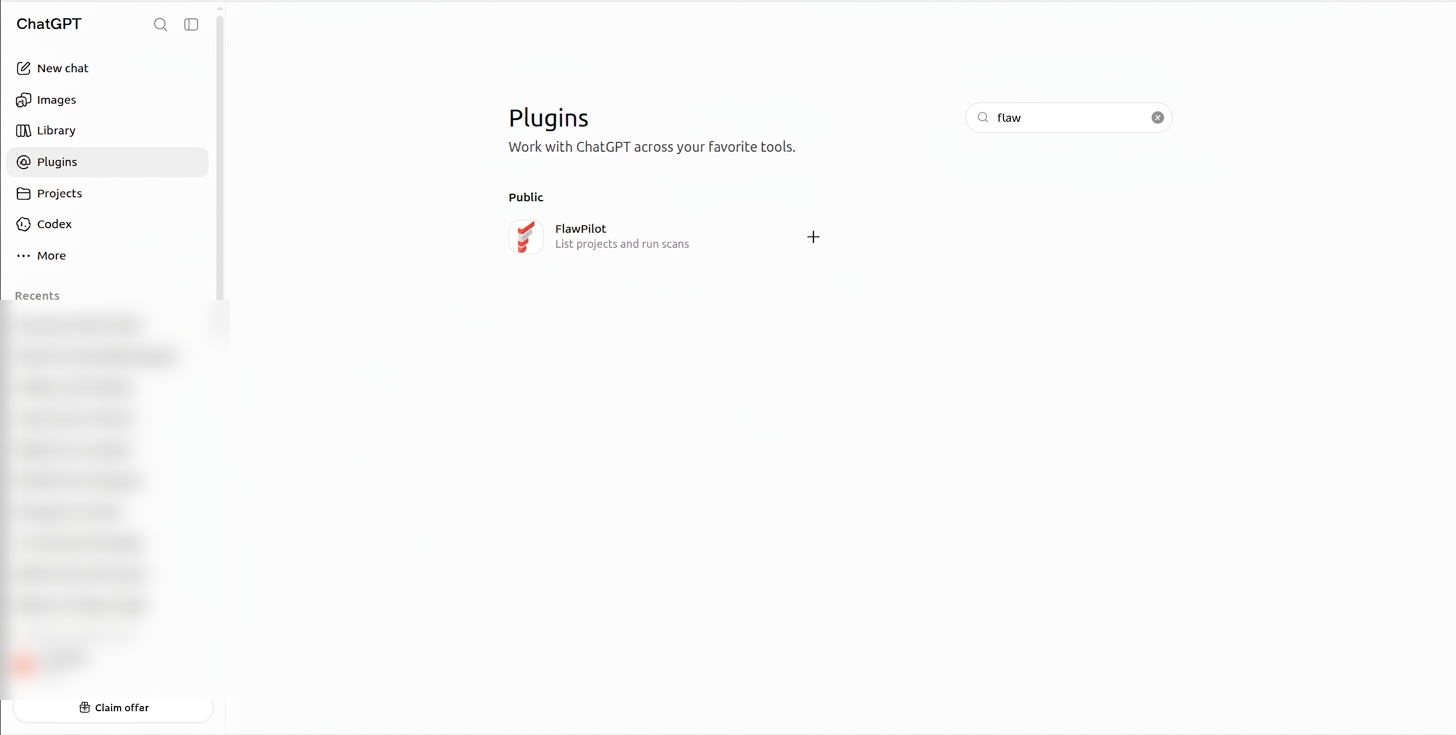
Searching "flaw" surfaces the public FlawPilot plugin. Install the plugin
Open the FlawPilot listing and choose Install plugin. The page describes what it does: list your tenant projects, trigger security scans, and check scan status from ChatGPT through an authenticated MCP server.
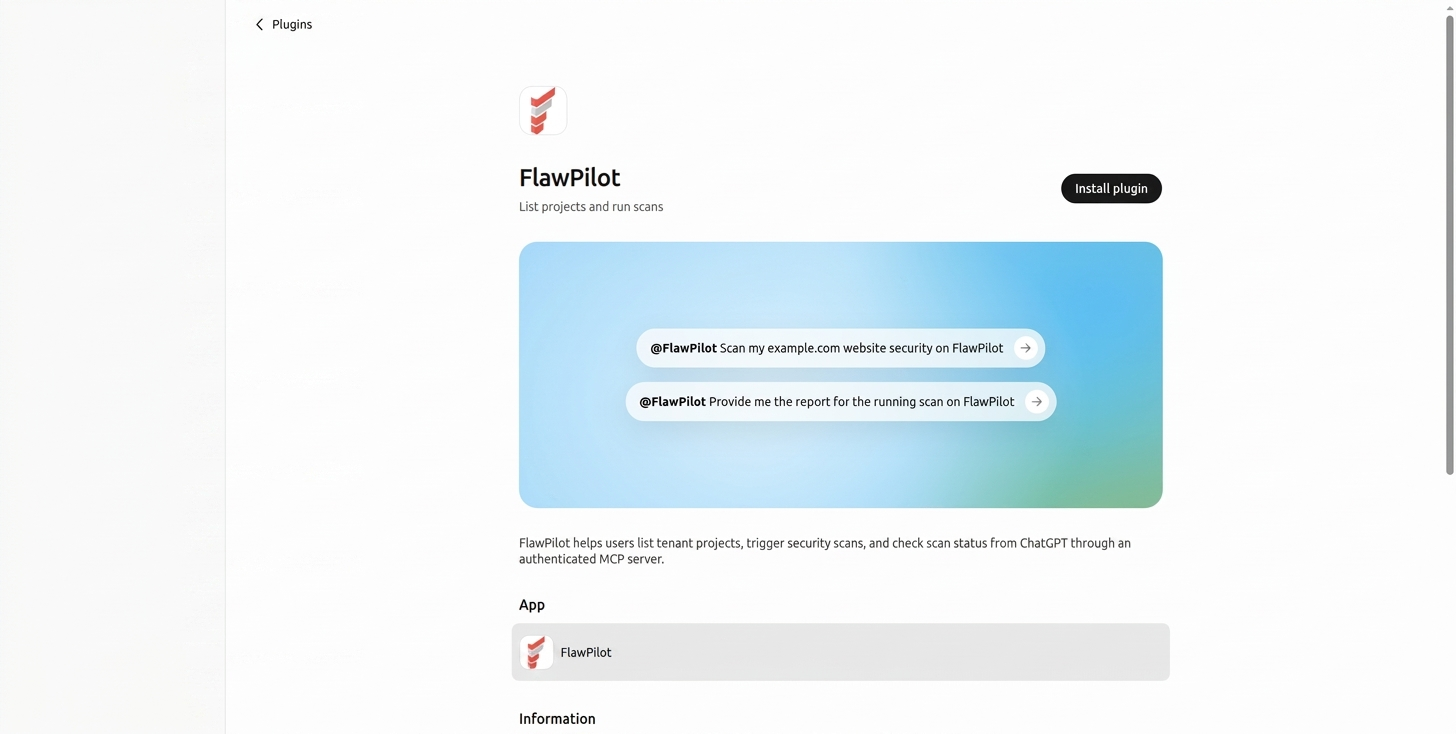
The listing shows the example prompts and an Install plugin button. Approve access to your workspace
Sign in to FlawPilot and approve the connection. Pick the workspace ChatGPT should work in - it will be able to run scans and read findings for that workspace only.
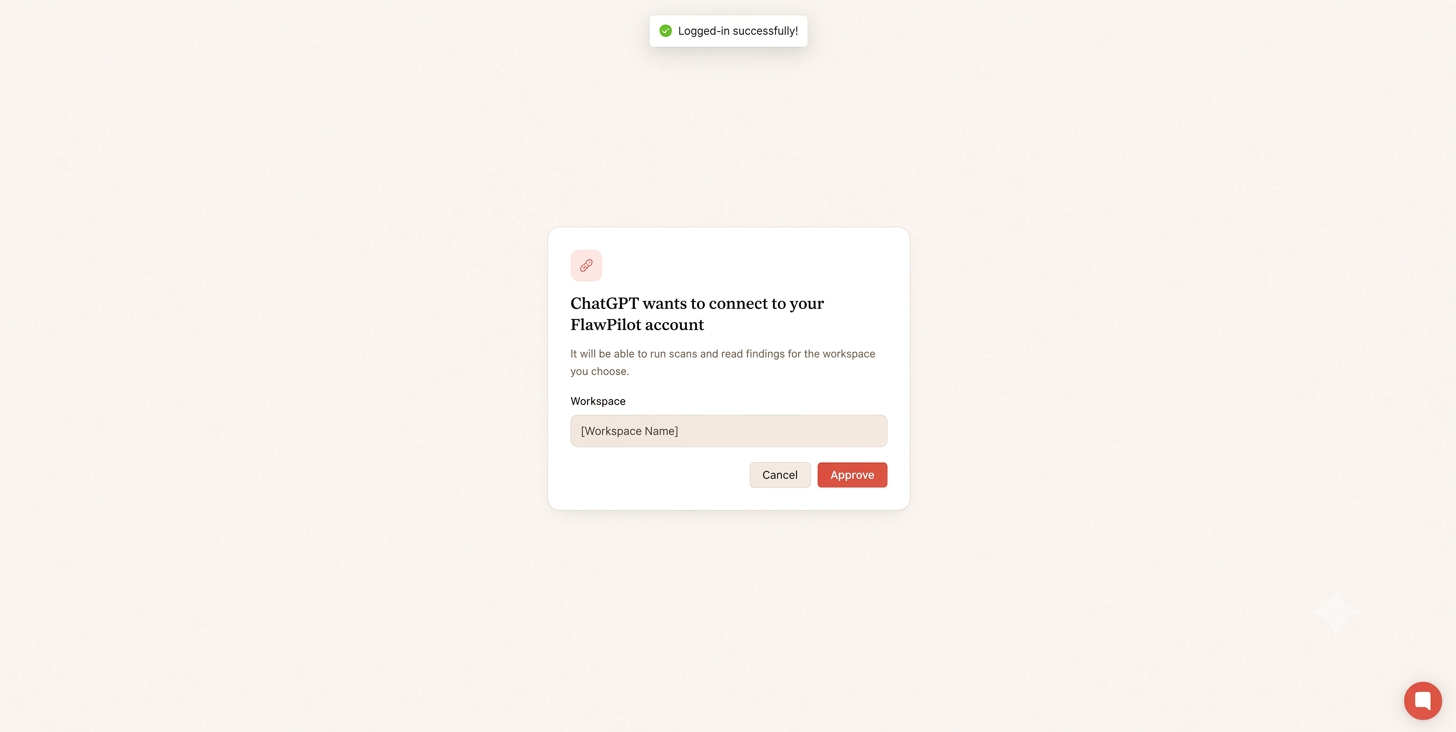
Choose the workspace, then Approve. Scope is limited to that workspace. Confirm it installed
The listing switches to "FlawPilot is installed" and offers Try in chat, which opens a new conversation with the plugin already attached.
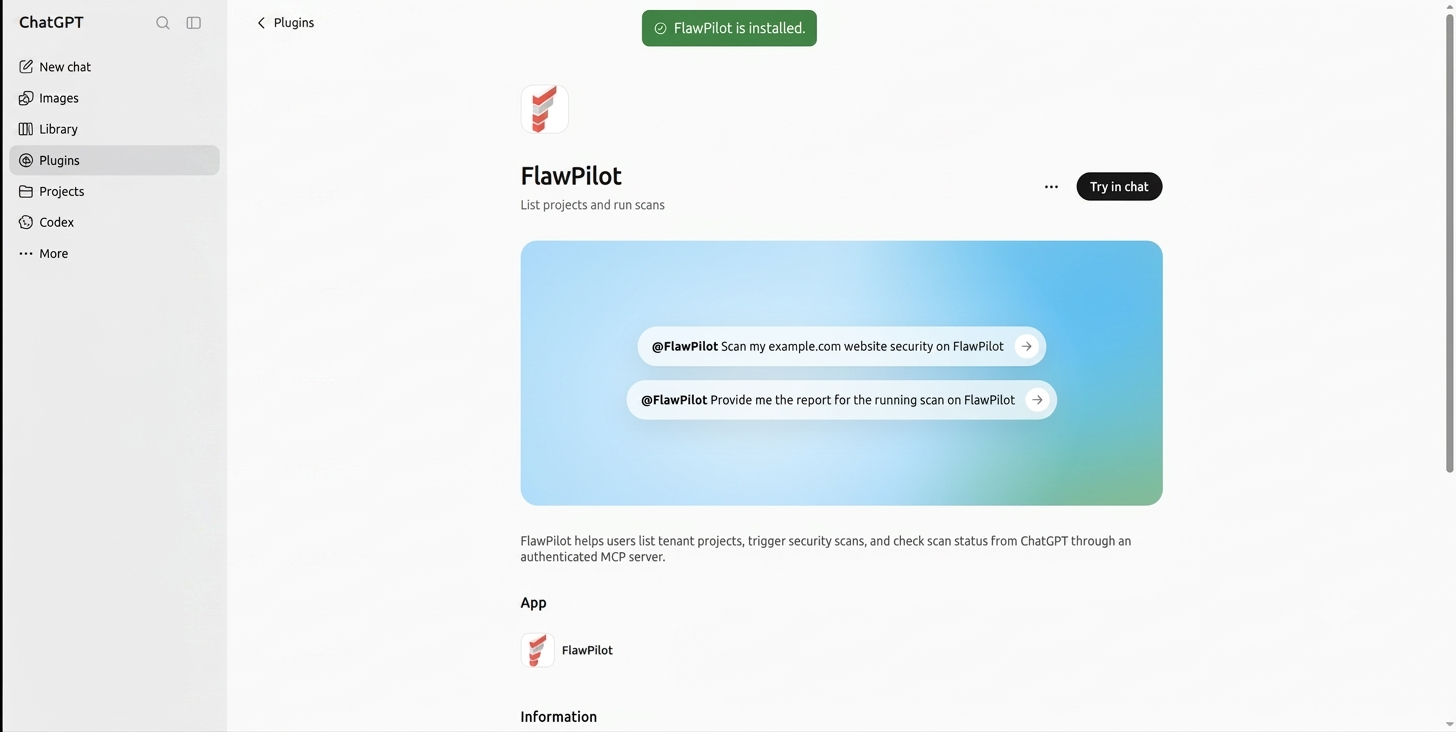
Try in chat opens a conversation with FlawPilot attached. Ask for a scan
In the composer, the FlawPilot chip shows the plugin is attached to the message. Ask in plain language - name the site you want scanned.
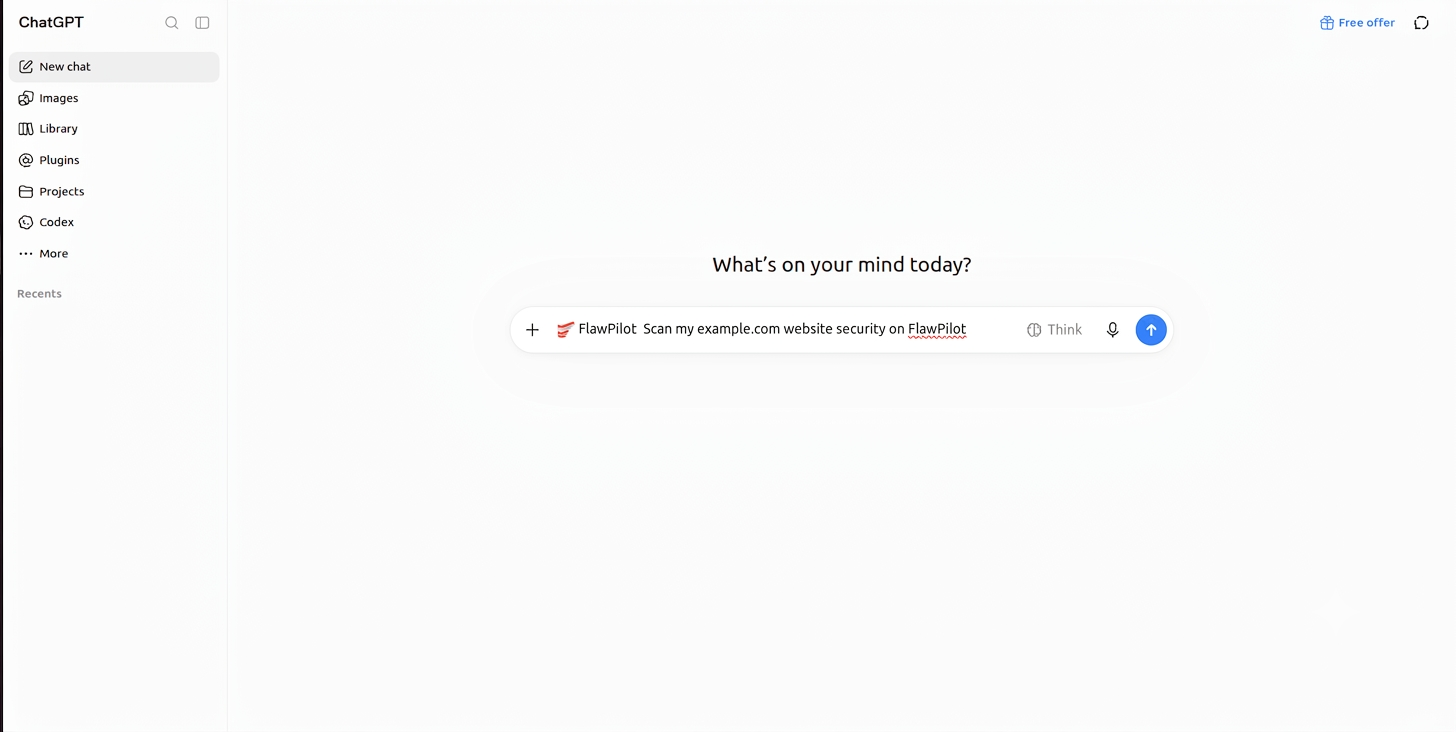
The chip on the left of the composer means FlawPilot will handle the request. Confirm scope and read the results
FlawPilot finds your active project, asks whether to run all four pillars or security only, and whether to email the report. Answer and it queues the scan, then polls until the findings are ready.
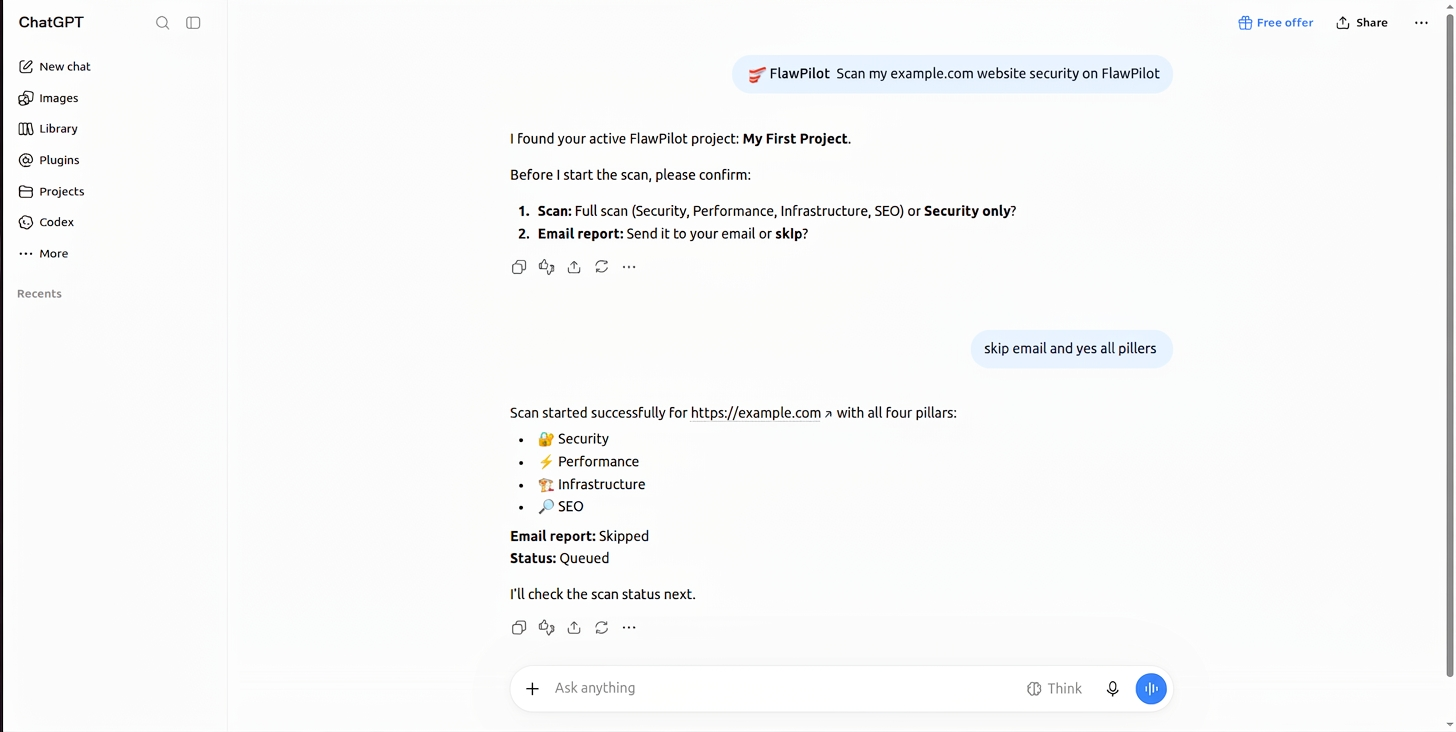
FlawPilot confirms scope first, then queues the scan and reports status.
Try it in a chat
With the connector enabled, ordinary questions are enough.
- “Scan my example.com website security on FlawPilot”
- “Provide me the report for the running scan on FlawPilot”
- “Which FlawPilot findings should I fix first, and why?”
If something does not work
- There is no Plugins entry in the sidebar
- Plugin access depends on your ChatGPT plan, and on Business or Enterprise workspaces an admin may need to allow plugins first.
- FlawPilot does not appear in the search
- Search for "flaw" rather than the full name and check the Public section. If it is still missing, your workspace may restrict which plugins can be installed.
- ChatGPT replies without using FlawPilot
- Check the FlawPilot chip is on the composer before you send. If it is not, reopen the plugin listing and use Try in chat, or mention @FlawPilot in the message.
- The scan never returns findings
- A scan takes a couple of minutes. Ask for the report on the running scan rather than starting a second scan for the same URL.
Connect another client
The same endpoint works with Claude, Cursor, VS Code, and any other MCP-compatible tool.
See all clients